My IoT adventure: GridDude
So as a prize from NIO I got an esp8266. It’s this low-cost WiFi module you can program or communicate with through serial. I also got an Arduino, and a kit with a breadboard, some buttons, resistors, LEDs etc. I was wondering what to do with these new things, sitting at my desk putting buttons in a breadboard. Not being particularly fond of the whole “Internet of Things”-shtick, I didn’t want to do any more or less useful sensor data collection. Instead, I was deeply perplexed by the newly mounted buttons. Putting four in a row I could try quickly pushing them in patterns. Doesn’t sound all that fun, but I saw the skinner-box potential. All I needed was a good way of presenting some fruit of my button presses.
Another place I kill time is in Emacs. While looking through a file with C-f, C-b, C-n and C-p, I’ll sometimes start moving quickly in circles. It’s not very helpful to my programming, but if I stick to a pattern of pushing each button once, the cursor will stay within the same three or four chars. But hold the phone, doesn’t this sound familiar? Could we translate the goal of pushing F,B,N,P in patterns to some other place?
So that’s what I’ve been doing for the last few days.

Riveting, isn’t it
The game
…if you can even call it that, consists of a dude on a grid. The dude is red, and normally doesn’t do much. When I push buttons connected to the Arduino, it sends the updates to the server as a string of ‘U’, ‘D’, ‘L’ and ‘R’. These movements are done to the dude, and behind him is a trail. The more you’ve visited a tile, the darker the color.
GridDude on heroku
Source on GitHub
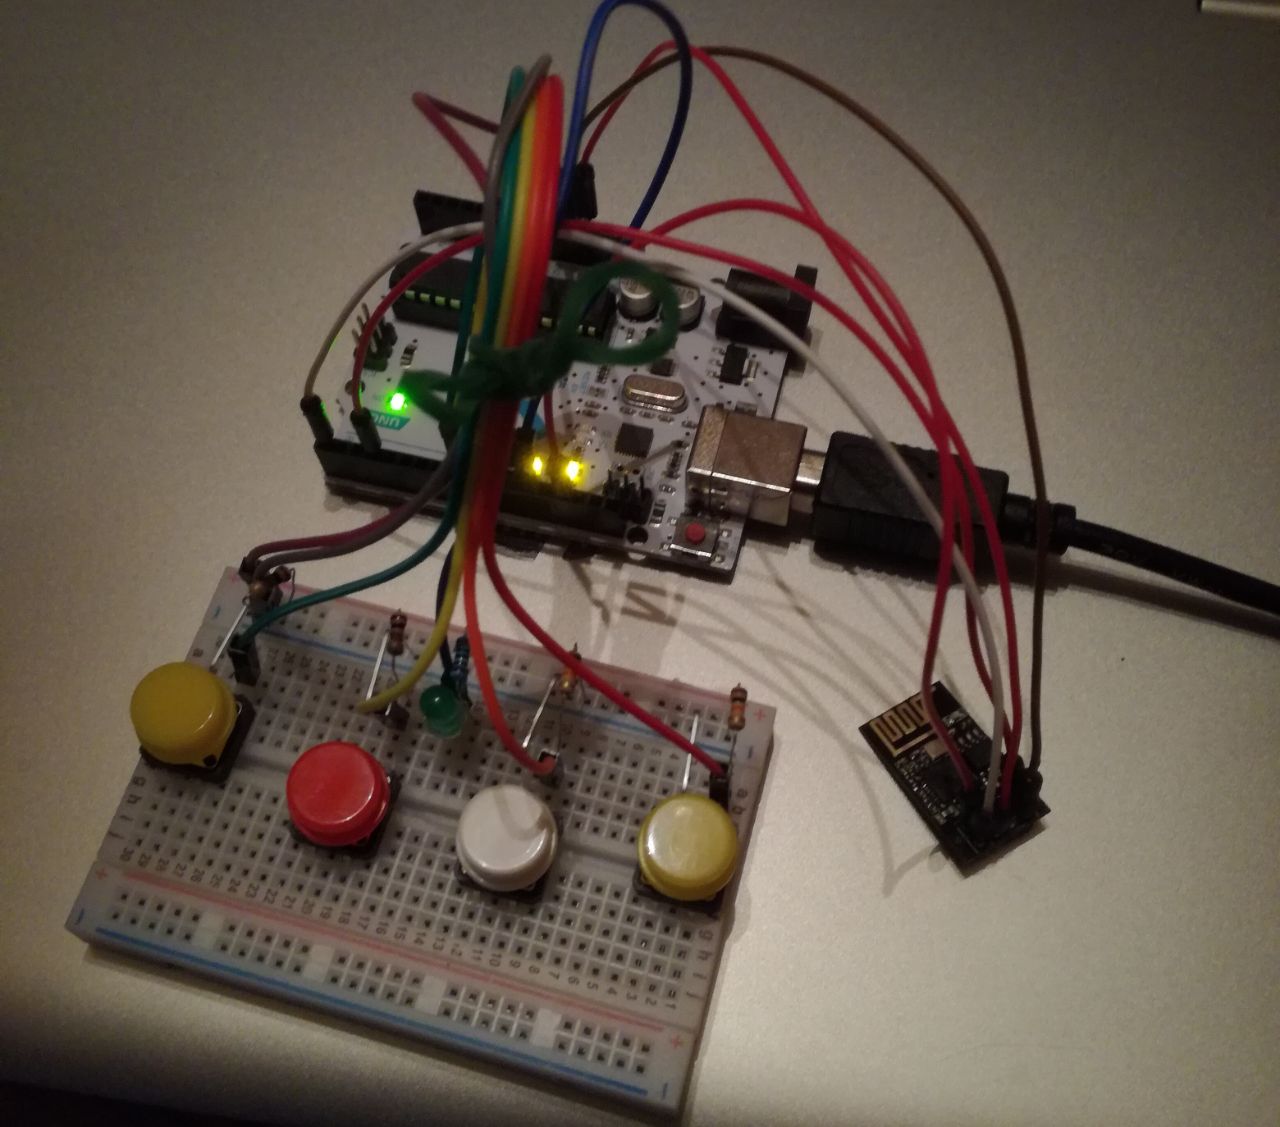
The physical thing, still on a breadboard.
The wiring
Before going on vacation I soldered jumper cables to the esp8266 since the pins were too close to each other to fit on a breadboard. Problem was I’m bad at soldering and short circuited something. I cut off the pins, but now had no practical way of connecting it to the Arduino. Luckily the jumper cables I had used could be opened up to disclose friction sockets. The esp8266 is now surprisingly well connected. The rest of the wiring is just an LED and four buttons, with resistors to ground. There are some interesting things to note about the Arduino pin choices, but I’ll come back to that.
The website
A guy at NIO had demonstrated making a website on Heroku with a custom python server.
This could come in handy, I thought, seeing as a 100x100 grid of random access integers best fit in RAM.
I started writing the server, as can be seen on GitHub.
I had to google a lot to understand which HTTP headers were strictly necessary,
but even with google, understanding how Heroku wanted headers was a bit difficult. I made mistakes and simply got router errors in return.
It worked on my localhost server, but they gave 503s. They wanted to give me HTTPS, though, so it is OK.
Debugging this was not fun however, seeing as some of these requests were POST requests made by the Arduino, which I had to mimic in Firefox.
Problem being that Firefox wouldn’t let me not send all the headers, AFAIK.
After getting it to work from Firefox, I also had to find out which headers the Arduino strictly had to send to satisfy Heroku.
In the end I send:
POST /update_grid HTTP/1.1
Host: grid-dude.herokuapp.com
Content-Length: <# of presses>
I needed the Content-length on the server side to not read past the end of stream. There is no EOF apparently, so I can time out waiting for data after the end of the stream. For the normal website parts I didn’t bother with Content-length. I was putting one file into a template file, and adding two file sizes together seemed like work. Besides, god knows if newlines are \r or \n or \r\n. Browsers didn’t seem to mind.
The content on the website is a simple html5 canvas. I had to use JavaScript to make it fit the screen, but canvases require JS either way, and I wanted to use jQuery for the get requests, so I wasn’t too bummed. I used JSON for once to communicate a grid data object between the python server and the JavaScript client. It was easy to set up, but it felt bad to use dictionaries like that. There are some bad solutions in the code base.
Also, python might not have been a good choice for language as I felt forced to do dictionary stuff for my globals. But then again, Heroku, as I came to find out, reboots at least once a day, meaning the globals are lost. I don’t know what kind of permanent storage works for this odd. Many single-tile increments and full grid dumps. For the time being you grid artwork is highly volatile.
Serial from/to Arduino
I wanted the Arduino to send serial to both the esp8266 and the computer. You see, debugging through binary searching blinking LEDs is not fun. Problem is the Arduino Uno only has one hardware supported Serial in/out. The esp8266 used a 152000 baud rate, which was too fast for the SoftwareSerial to read. The serial over USB is locked to the hardware supported one. So how did I communicate with both? Hardware supported output is already locked to computer output. I don’t bother with serial input from the computer, though, so the esp8266’s output fits in the hardware supported input, as it needs to. The esp8266 input can be output from a SoftwareSerial, even at the 152000 baud rate, so it gets hooked up to Arduino pin 3 or whatever. Note that this pin is 5v, higher than the rest of the esp8266 which is connected to 3.3v, as it should be. I give no guarantees that your esp8266 won’t blow up if you do this.
NB: You have to unplug the esp8266 from the Arduino’s RX while flashing it.
This cross-Serial scheme came late though, so I had had to struggle with blinking LED debugging for a while. To debug in steps i listened to the input stream from the WiFi module, using Serial.find() to wait for keywords before progressing. Problem is that I want to listen for button presses even when this happens. The solution was to never use delay while also doing network, but to instead use the timeout on the Serial.find() to wait between button polling. This way no serial data can escape me.
Listening all the time is quite important seeing as the buffer only is 64 bytes big. If I get more than that some data will be forever lost, causing Serial.find() to never get what its waiting for. Just like on the internet there is no EOF signal, so I have no way of knowing if the stream is done or more is on its way, making continuous listening all the more important.
The takeaway
Web debugging is not far from hardware debugging. Both are difficult when you’re used to having everything locally and accessible. Both involve restricted output, either by means of LEDs or heroku logs. Both also involve streams with no end of file signals. If you try reading past the end, you time out waiting for data that never comes. Therefore you have to specify content length. This makes the whole \r vs \n vs \r\n even worse. God knows if each newline is two bytes or one.